

Organizing & Storing Photos
Organizing and storing your photos isn’t just about keeping things tidy; it’s an important step in preserving precious memories. Over time, photo prints, slides, negatives, and paper memorabilia can deteriorate if not stored correctly. Taking the time to organize them now ensures they’ll be around for years to come.
Getting Started
Before you begin, consider your motivation. Why are you tackling this project? Perhaps you want to protect your photos from damage, create a family album, or make sure your memories are preserved for the next generation. Keeping your “why” in mind is important—it will keep you motivated, especially when the process feels overwhelming. If your collection includes hundreds or even thousands of photos, it’s normal for the task to test your patience.
Set realistic expectations for yourself. Organizing a photo archive is rarely a quick afternoon project; it often takes weeks or even months, and that’s completely normal. To make the task more manageable, break it into smaller, achievable goals.
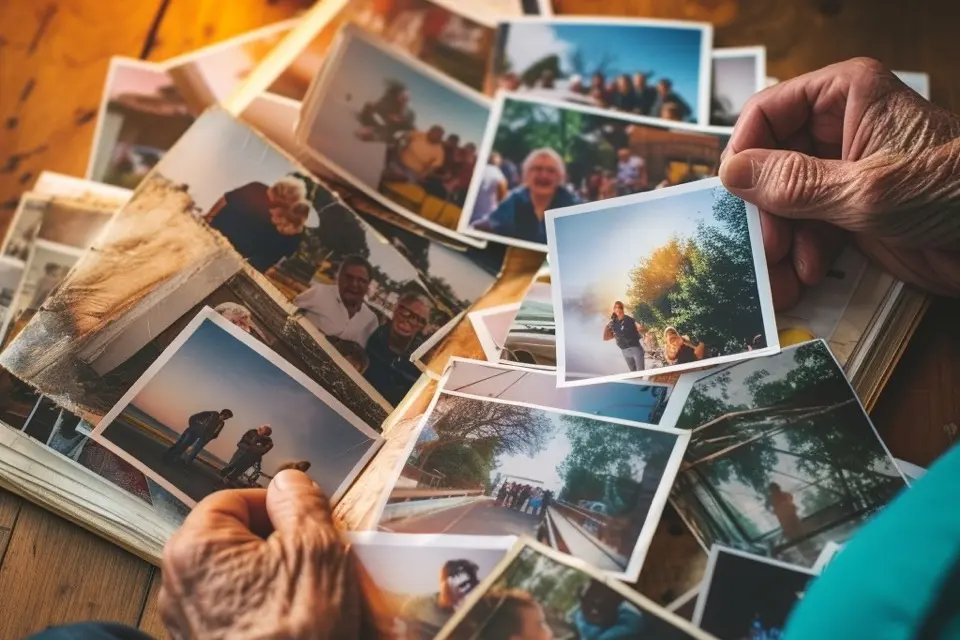
One of the most enjoyable—and distracting—aspects of this project is reminiscing. While it’s fun to revisit old memories, be mindful of the time you spend on it. Once your photos are organized, you’ll be able to look through them whenever you want.
First, Keep or Toss?
By identifying categories in advance, you’ll know immediately which photos to keep or toss, making decision-making easier and saving time. Here are some guidelines to help you declutter:
- Duplicates: The easiest decision—toss extras. If someone else might appreciate them, pass them on, but avoid creating another project for yourself.
- Almost duplicates: Photos that capture the same moment or subject—keep just one or two.
- Unflattering photos: Ask yourself if this is a photo you want to pass down for future generations to see.
- Scenery pictures: Keep these if you love photography or nature. Otherwise, keep your favorites that include people with beautiful backgrounds.
- Underexposed, overexposed, or blurry photos: Poorly captured photos—even from big events—should be tossed if you have better versions. If you can’t recognize the people, let them go.
- Poorly composed photos: Shots of feet, the backs of heads, or similarly unclear subjects can be tossed.
- Distant subjects: If the subjects are so far away they’re unrecognizable, it’s best to let them go.
- Photos of exes: Decide if you want to keep photos of people from past relationships. Keep those with fond memories and remove ones you’d rather not remember—you decide what stays.
- People you don’t know: If you don’t recognize the people in a photo, it’s okay to toss it.
Gather Organizing Supplies
To organize your family photos efficiently and safely, gather the right tools before you begin. Look for products labeled archival, acid-free, or photo-safe, as these will help preserve your photos in the long term. Here’s a checklist of essentials you’ll want to have on hand:
- Index cards: Useful for labeling categories or time periods during sorting.
- Photo safe pen: For writing on labels or directly on the backs of photos without causing damage.
- Archival clear photo sleeves or photo storage envelopes: Ideal for temporary storage as you decide on your final system.
- Acid-free photo storage box: These are excellent for keeping prints safe; find ones you love and trust.
- Cotton gloves: Oils from your hands can degrade photos, so wear gloves or wash your hands and handle prints by the edges.
- Label maker: Makes it easy to keep boxes, envelopes, and sleeves clearly labeled so you can find what you need quickly.
- Dental floss: Slide a piece gently under old prints that are stuck to album pages to remove them without damage.
It’s also helpful to set up a dedicated space for photo organizing—a card table, spare desk, or a quiet corner of your office works well. Choose somewhere your in-progress piles won’t be disturbed. Having a consistent spot makes it easier to resume work and keeps everything contained throughout the project.
Set Up an Organizing System
Before diving into sorting, decide on a system for organizing your photos. Begin by pulling out a few boxes or albums and scanning what you have. Think about the best way to group your photos so it feels natural for your collection.
Start with broad categories, giving yourself flexibility as you go. Often, the right system reveals itself as you sort through more photos. Consider organizing in the following ways, depending on what fits your archive best:
- Decade: Group photos from the 1980s, 1990s, and so on.
- Year: If your photos are dated or easy to identify, you can organize by individual year.
- Era: Childhood, high school, college years, etc.
- Category: Holidays, birthdays, vacations, school events, sports, and more.
- Person: This method can be tricky since many photos feature multiple people, but it’s useful if you plan to divide the collection among family members.
- Event: Trips, weddings, graduations, reunions, and similar occasions.
For our family archive, organizing chronologically by year, month, and event made the most sense based on our goals. If this approach works for you, start with broader categories like decade or era. Once everything is loosely grouped, you can further sort photos into more specific events and timelines. Beginning with broad categories helps keep the process manageable and reduces overwhelm early on.
Organizing Memorabilia and Other Media
As you go through your collection, you’ll likely encounter photo negatives, Polaroids, damaged or faded prints, VHS tapes, CDs, and paper memorabilia. Set these items aside in clearly labeled piles so you can scan, restore, or convert them later if needed. There are archival storage solutions available for every type of media, so you can protect them all properly.
If your main goal is to organize printed photos first, don’t worry about tackling everything at once. You can always return to organize important papers and memorabilia once your photo archive is in good shape.
Scanning and Backing Up Your Photos
After storing your physical photos safely, the next step is to create digital backups by scanning them. While it may seem daunting to organize everything digitally after sorting your entire collection, the effort is worthwhile for peace of mind and easy access. Since your photos are already categorized, digitizing them should be straightforward. Remember, you don’t have to do it all at once.
If buying a scanner and scanning photos and negatives yourself doesn’t appeal to you, there are many photo scanning services available that will handle everything for you.
Enjoying Your Organized Photos
Once your photos are sorted and safely stored, it’s time to enjoy them. A family photo archive shouldn’t live in a box forever; it should be an active part of your home and your family’s story. Here are some ways to bring your collection into daily life:
- Scan and share your favorite photos with family members to reminisce together. It’s a perfect way to spark group conversations and discover new stories.
- Frame your favorite prints for a gallery wall or display them in frames around your home.
- Design modern photo albums with services like Artifact Uprising. Their 11×8.5 Hardcover Photo Book is great for creating clean, beautiful albums. I made our wedding and travel books using their tools.
- If you enjoy scrapbooking, try pocket scrapbooking. Use a 3-ring photo album and slide prints into clear pocket pages. Although selection is more limited these days, Scrapbook.com and Amazon still offer good options.
